How to Prepare Your Home for Interior Decorating
Starting an interior decorating project brings a mix of excitement and stress to those who want to begin their work. The success of your Surrey home renovation depends on complete preparation whether you want to update one room or transform your entire property.
Our experience at Surrey Painters shows that projects which involve intelligent preparation work tend to produce results that surpass regular expectations.
The guide provides you with all necessary information about preparation work before you start painting your home because it contains practical information and safety guidelines and UK-specific information to help you finish your interior decorating work while following all required standards.
Why Proper Preparation Is Essential
The start of any project determines how well the final work will turn out according to what homeowners understand. The finished appearance of paint or designer wallpaper will lose its appeal because surfaces require correct preparation before application.
The surface shows its imperfections through visible cracks and dust and grease and uneven textures which will lead to paint peeling and bubbling before its scheduled time.
Decorators who work professionally dedicate about 70% of their total work hours to preparation activities. The decorator will achieve a better finish through your self-completed work before they arrive because you will conserve your time and money.
Step 1: Clear and Protect the Room
Remove or Relocate Furniture
You should remove everything from the room to achieve the best result. Move your furniture to the middle of the room when you cannot empty the space then protect it using strong dust protection sheets. The protective measure functions to prevent paint drops from reaching surfaces while it also blocks dust from settling and protects against unintentional damage.
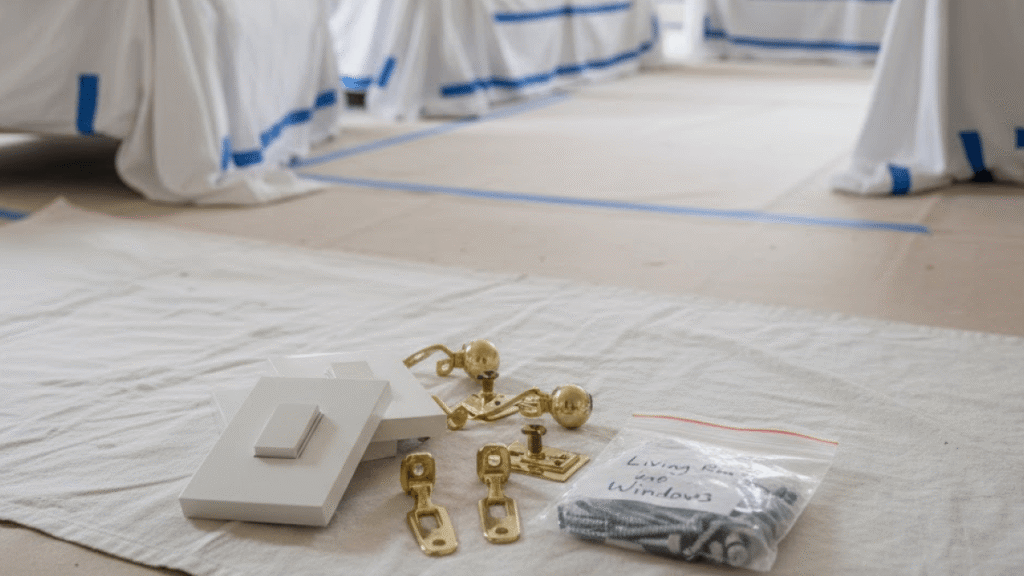
Take Down Wall Fixtures
Remove:
- Curtains, blinds, and curtain poles
- Wall art, mirrors, and shelves
- Light switch plates and socket covers (always turn off power at the fuse box first)
- Door handles and hinges (if being repainted separately)
Your decorator can access all wall surfaces because this method allows them to reach every corner and edge and surface for achieving perfect coverage and precise line work.
Step 2: Repair and Clean All Surfaces
Fill, Sand, and Smooth Imperfections
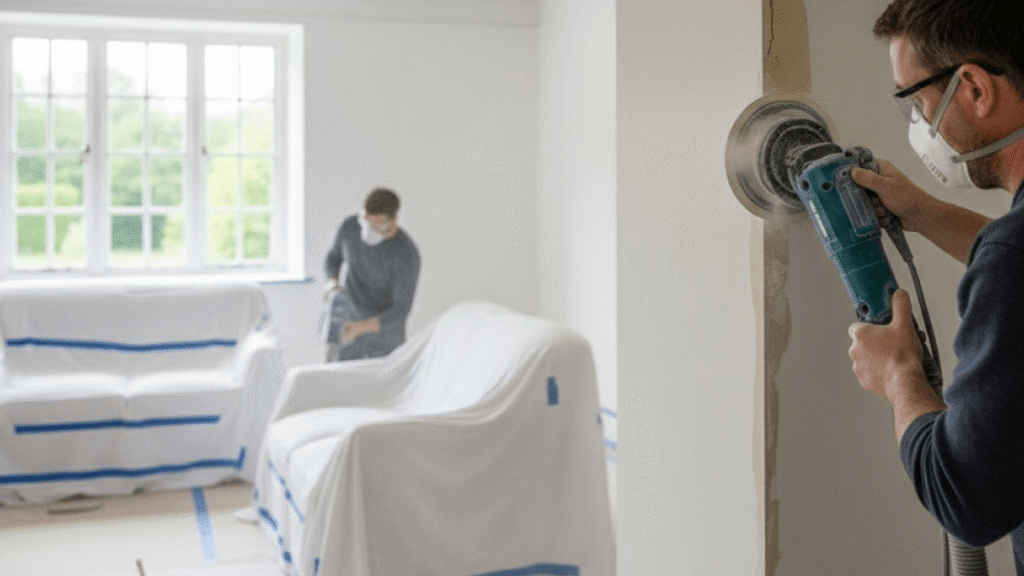
Inspect walls and ceilings for:
- The walls and ceilings need interior filler to repair their cracks and holes and dents.
- You need to remove all paint flakes before you sand the surface to achieve a smooth finish.
- The plaster damage and wallpaper seams which have torn need inspection.
Sand every repaired area after you apply the filler until the surface becomes level with the rest of the wall. The surface needs to receive a damp cloth cleaning because any remaining dust particles will create problems when you try to paint.
Deep Clean Walls and Trim

Walls require complete cleaning through sugar soap or you can choose to clean them with a mild soap solution. The process removes all kitchen grease and nicotine stains and other dirt which prevents paint from properly adhering to surfaces. Rinse with clean water and allow it to dry completely—usually 24 hours in typical UK conditions.
Step 3: Plan for Practicalities and Safety
Ensure Good Ventilation
You need to open windows or run fans for better airflow during painting activities and after you finish. The process creates an even surface for paint to dry while it reduces dangerous fumes which protect your health and make your home more comfortable to live in especially when you work with older buildings.
Protect Floors and Adjacent Spaces
You should protect your carpets and hard floors by placing heavy-duty dust sheets or rosin paper on them. You need to seal doorways and air vents with masking tape to block dust from spreading because this step becomes essential when your house dates back to before 1978 since lead-based paint was still being used.
Step 4: Choose the Right Materials for Each Room
The performance of various paints and wallpapers depends on which environment they will be used in. Consider:
- Hallways and staircases require you to select satin or eggshell finishes which protect against damage from regular use and cleaning activities.
- You should select mould-resistant paints with low-VOC formulas which allow easy cleaning for your bathroom and kitchen areas.
- Soft-sheen or matte finishes provide your living space and bedroom areas with a peaceful and sophisticated atmosphere.
The restoration of period properties requires breathable paints which work with lime to prevent moisture from getting stuck inside solid walls.
Our team provides wallpaper hanging services throughout Surrey to deliver specialist finishes and we help you select colours which match your personal taste and room requirements.
Step 5: Coordinate with Professional Decorators
You need to maintain open communication when you work with professionals from Surrey Painters to achieve a smooth project experience.
- The team needs to understand when they can access the site and where they should park their vehicles because these conditions apply to urban areas including Croydon and Guildford.
- The workplace staff needs to discuss how they will protect their pets and children during operating hours.
- The team needs to reach an agreement about how they will handle their waste materials which include wallpaper rolls and empty tins and removed fixtures.
Our office painters based in London provide commercial clients with painting services during weekend and evening hours to keep their business activities running without interruption.
Special Considerations for Listed or Period Homes
The local council needs to approve your property modifications when you own a listed building or your home exists within a conservation zone. The process of repainting interior walls does not need permission but the elimination of historic cornices and panelling and decorative features requires it.
Historic England advises to maintain original building materials while selecting appropriate substances which will defend architectural features. The planning phase needs heritage specialist consultation because it enables you to identify potential heritage issues before you start your work.
Final Pre-Decorating Checklist
- Room emptied or furniture centrally grouped and covered
- All wall fixtures removed and labelled
- Holes filled, sanded, and dusted
- Walls cleaned with sugar soap and fully dry
- Floors protected with heavy-duty sheets
- Power turned off for electrical fittings (if being worked on)
- Decorator briefed on access, timing, and expectations
- The process of completing these steps creates the perfect foundation which helps you save time while reducing stress and results in a professional-grade outcome.
The process of completing these steps creates the perfect foundation which helps you save time while reducing stress and results in a professional-grade outcome.